
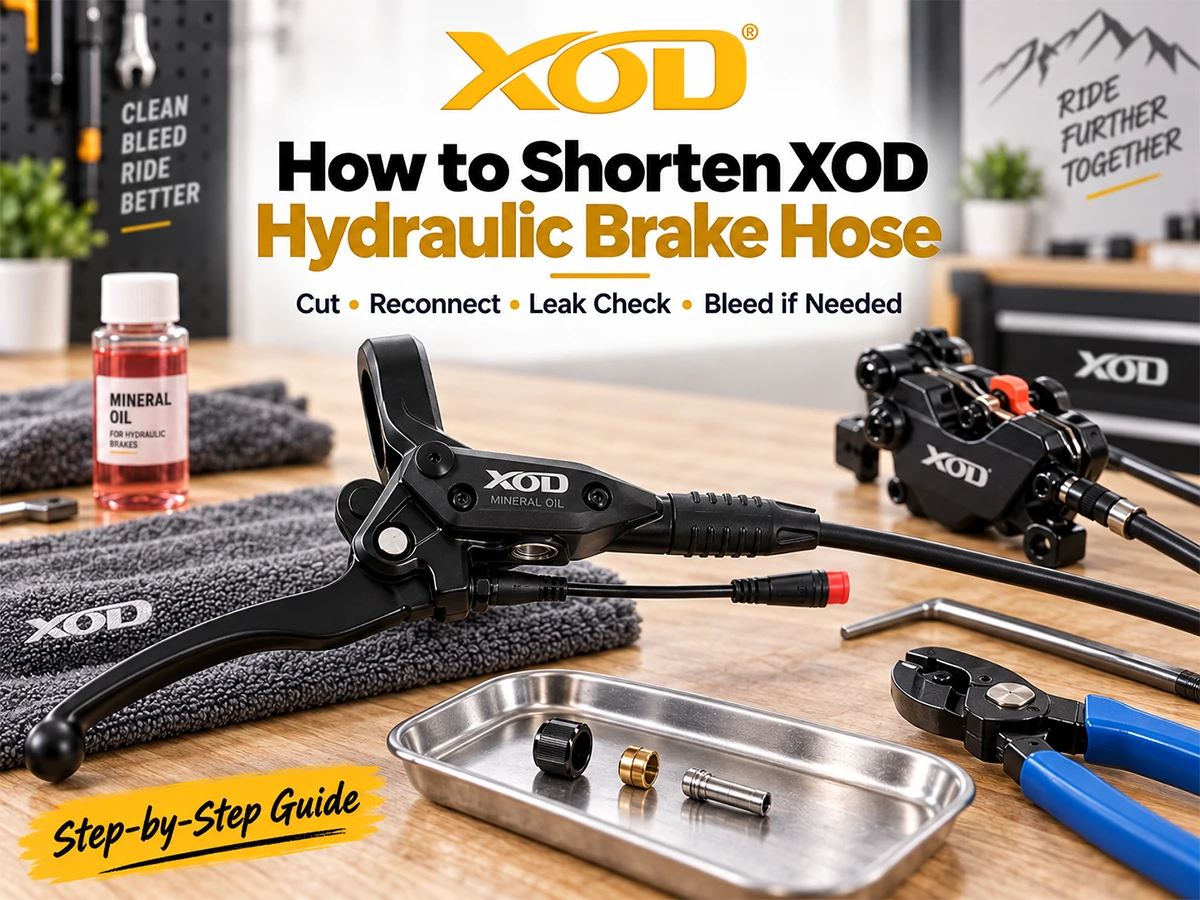
An XOD hydraulic brake hose that is too long can leave unnecessary loops around the handlebar or make cable routing untidy. The hose can be shortened, but the cut and reconnection need to be done carefully because opening the hose also opens the hydraulic system.
Route the hose first, leave enough slack for steering and suspension movement, mark the required length, make a clean square cut, install the hose barb fully, reconnect the fitting correctly and inspect the connection for mineral-oil leaks.
After reconnection, test the brake lever. If it feels soft, spongy or inconsistent, bleed the hydraulic system before riding.
📏 Before You Cut: How Short Should the Brake Hose Be?
The goal is not to make the hose as short as possible. The correct hose length should look tidy while still allowing the scooter or e-bike to move normally.
Turn the handlebar fully left and right. The hose must not become tight.
Leave enough hose for normal fork or suspension travel where applicable.
If the scooter folds, confirm the hose is not stretched during folding or unfolding.
Avoid sharp bends, kinks or unnecessary loops.
If the hose is cut too short, the safest solution is usually to replace it with a correctly sized compatible hose. Do not rely on improvised extensions or fittings that are not designed for the brake system.
🧰 What You Need to Shorten an XOD Hydraulic Brake Hose
- A sharp hydraulic brake hose cutter or other suitable cutting tool that can make a clean, square cut
- The correct hose barb / insert
- Compatible olive, hose insert and compression-fitting hardware for the exact XOD connection; confirm which components must be replaced and whether any may be reused before disassembly.
- Suitable hand tools for the hose fitting
- Clean paper towels
- Isopropyl alcohol for cleaning the exterior connection after assembly
- Mineral oil and a bleed kit if bleeding becomes necessary after reconnection
Hydraulic hose ends and fittings should be kept clean while the system is open. Dirt or damaged hose ends can make sealing and reconnection more difficult.
🔧 How to Shorten an XOD Hydraulic Brake Hose Step by Step
1Route, Mark and Cut the Hose
Install or hold the brake lever in its normal position and route the hose the way it will sit on the vehicle.
After confirming steering, folding and suspension clearance, mark the hose at the desired length.
Make a clean, straight cut. Avoid crushing or flattening the hose end.
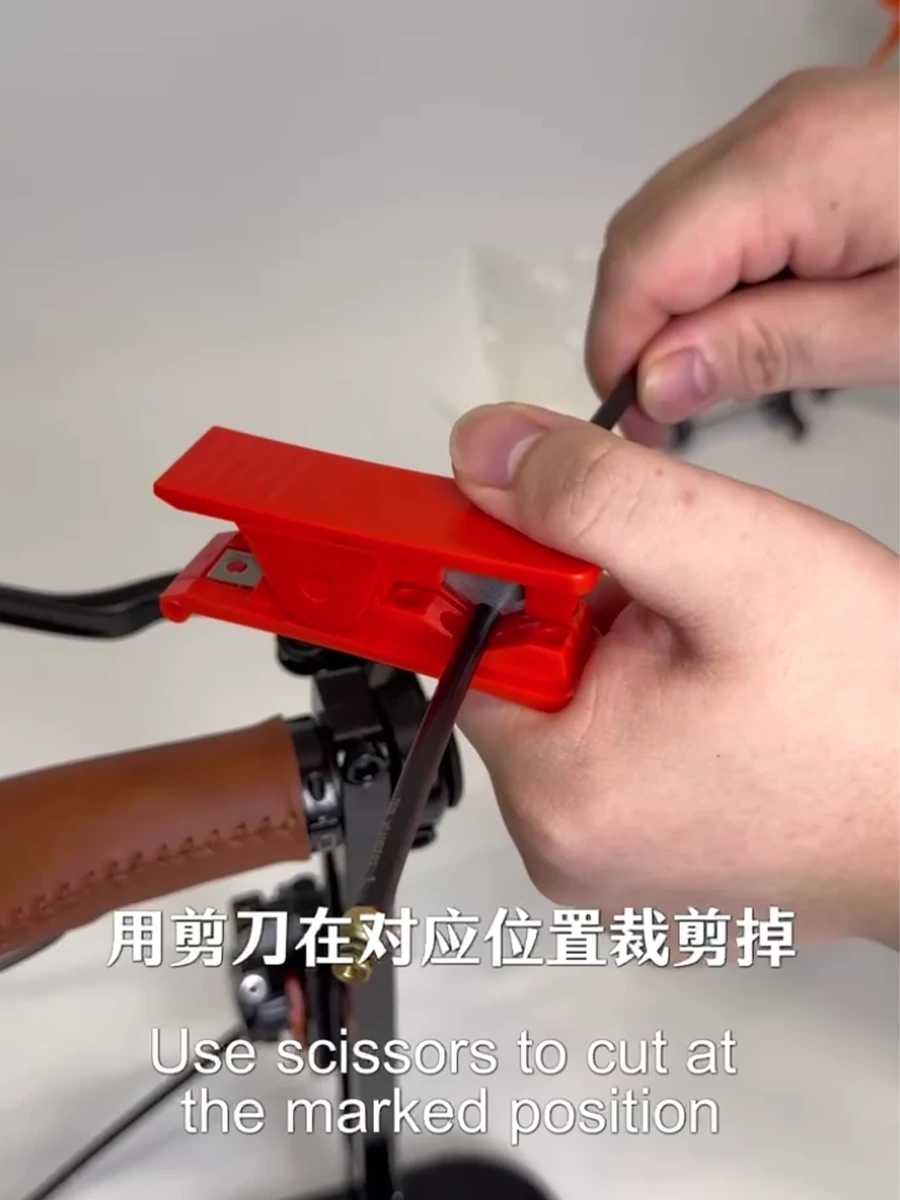
The hose barb and fitting need a clean hose end to seat correctly. A crushed or angled cut can make the next steps more difficult.
2Insert the Hose Barb
After cutting, keep the open hose end clean and insert the correct brass hose barb or insert squarely into the hose.
Start the barb straight. Do not force it into the hose at an angle.
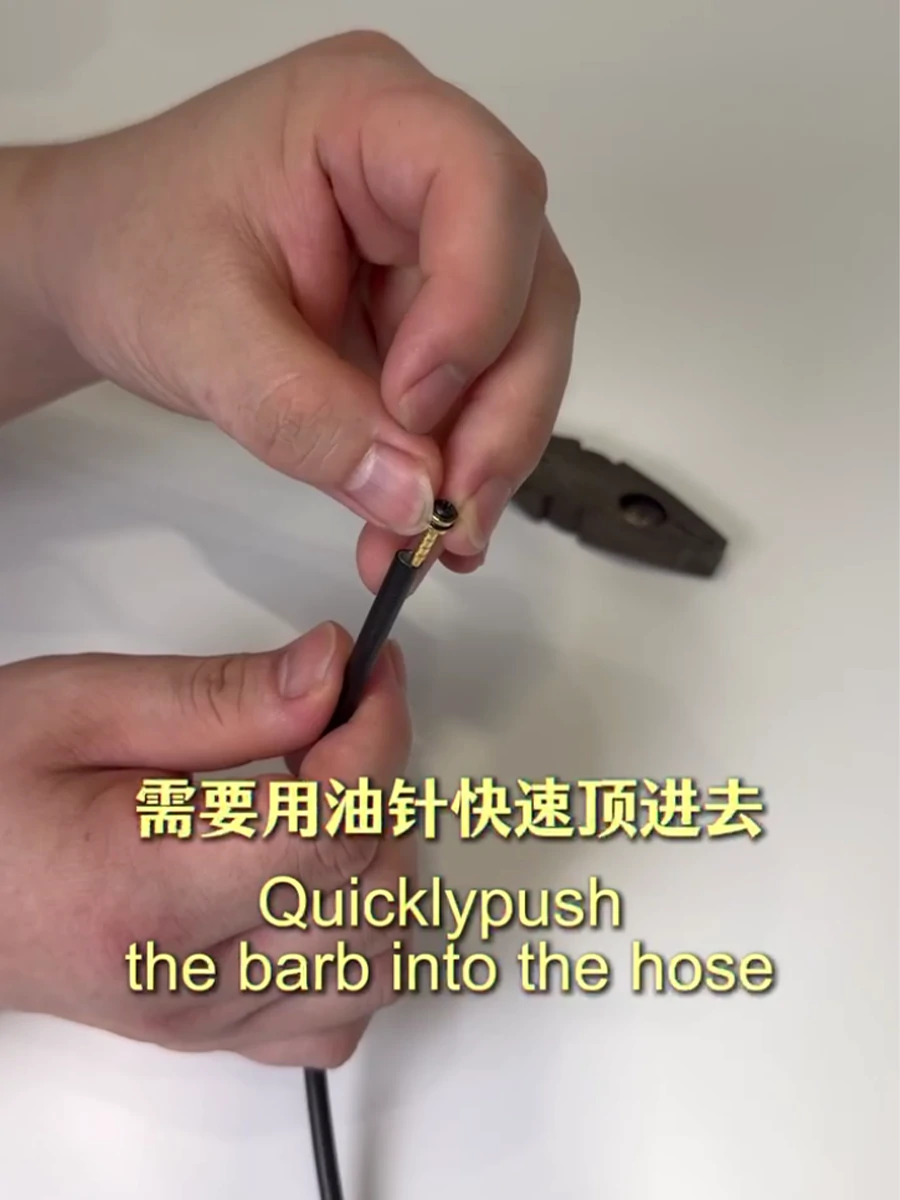
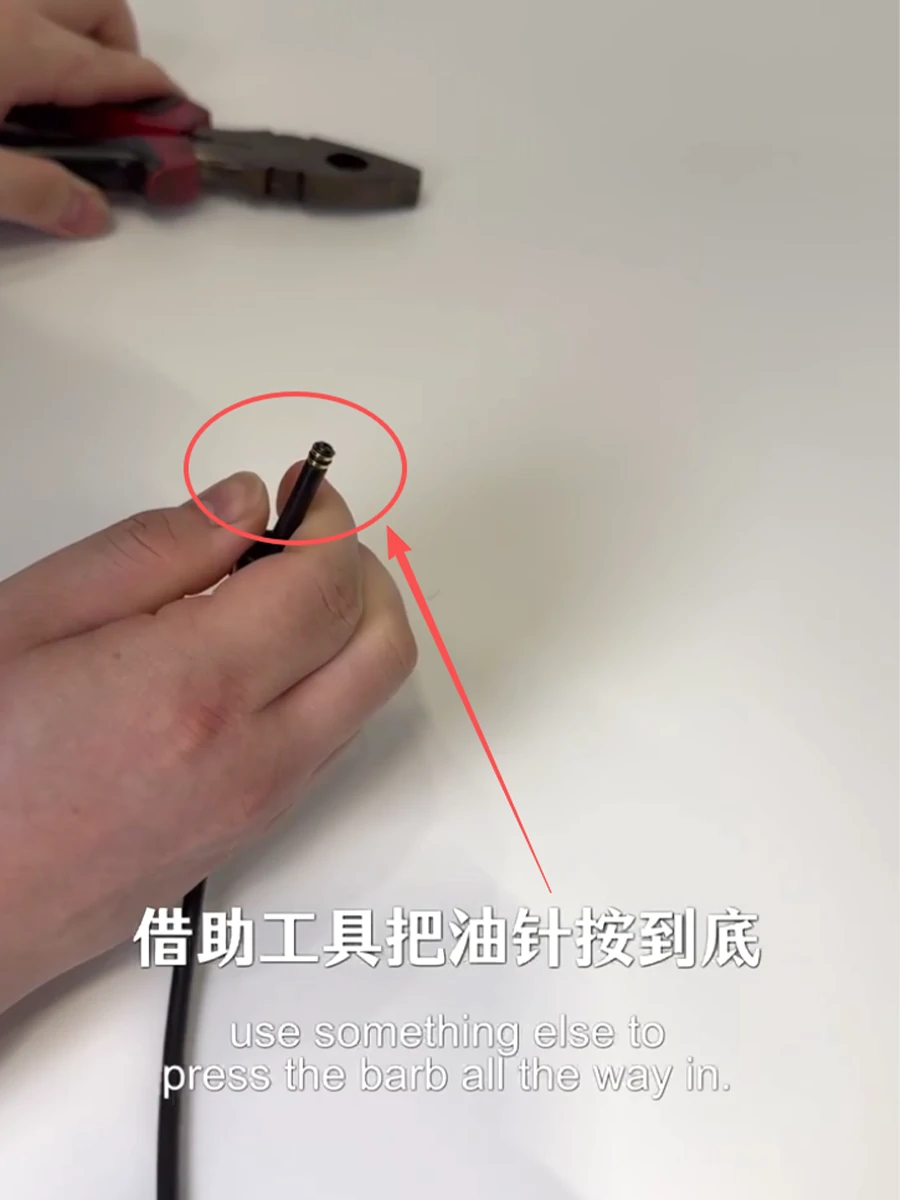
If necessary, use a suitable tool to press the barb fully into the hose without damaging the fitting or hose.
3Assemble the Compatible Olive and Compression Fitting
Confirm the component order for the exact XOD fitting and which parts must be replaced before reassembly. Do not assume an olive or insert is reusable because it was part of the original connection.
The tutorial shows the olive and compression components being positioned on the shortened hose before the hose is pushed back into the brake lever connection.
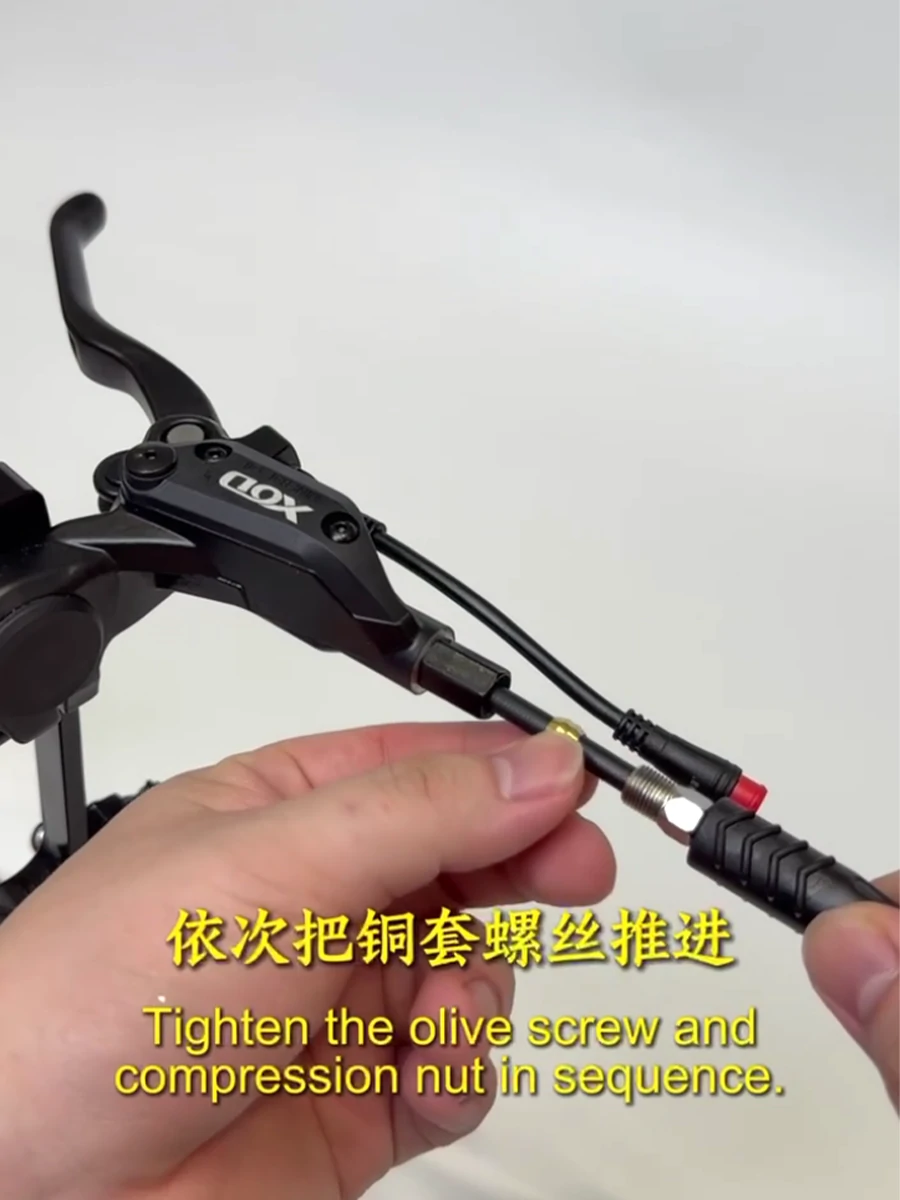
If your hose fitting looks different from the one shown in this tutorial, stop and confirm the correct component order for that specific brake before tightening it.
4Seat the Hose and Olive Correctly
Push the hose fully into the lever-side connection while keeping the fitting aligned.
In the XOD tutorial, the olive is gently moved into position to help it seat correctly before final tightening.
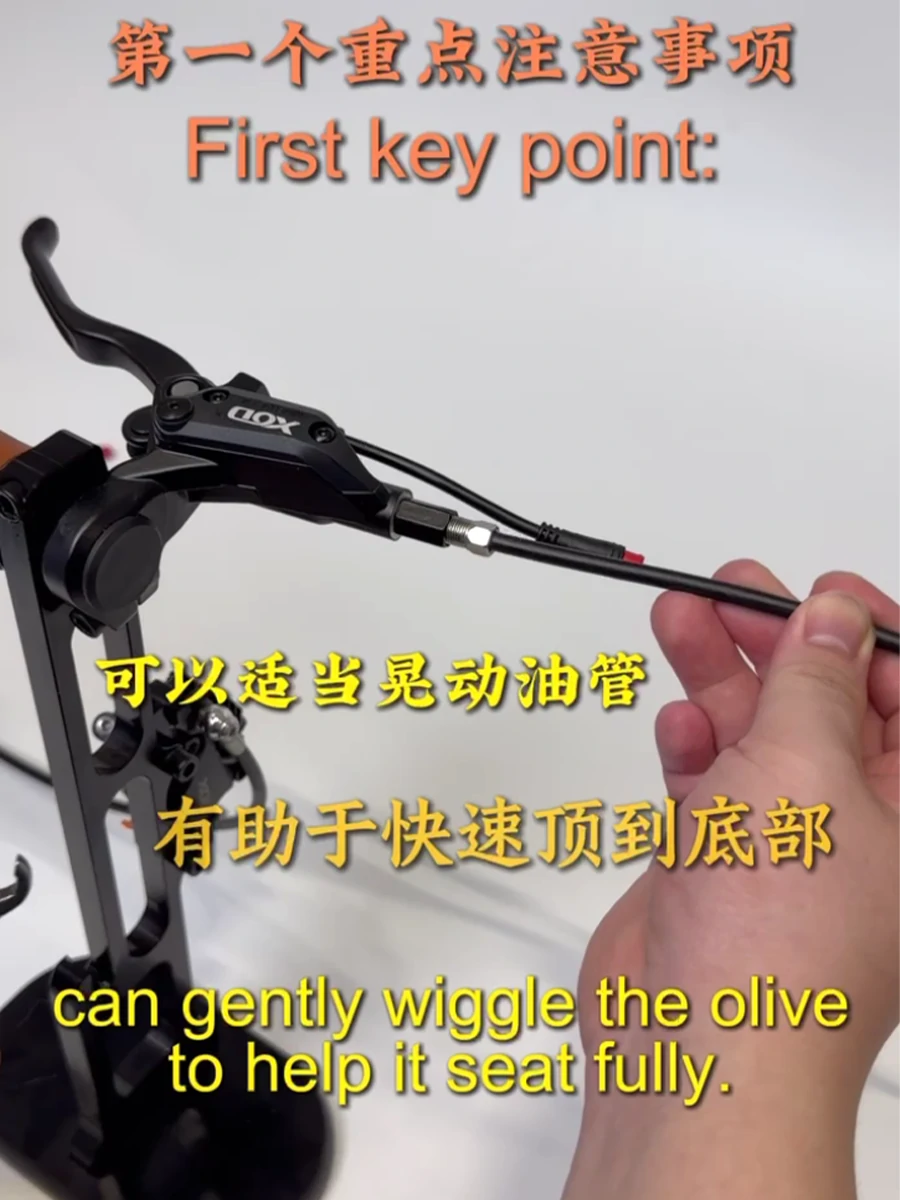
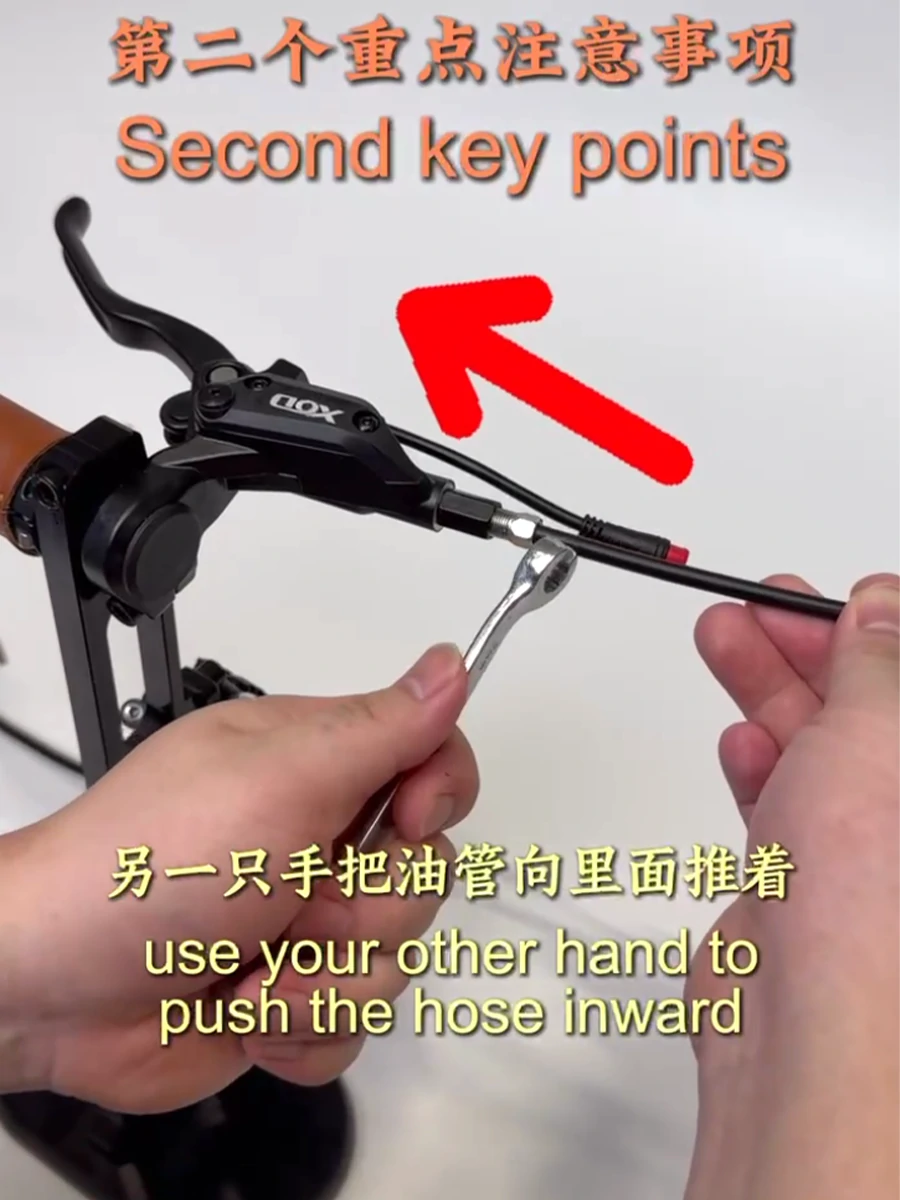
Do not twist or sharply bend the hydraulic hose while reconnecting it.
5Tighten the Fitting and Check Its Final Position
Tighten the connection securely using the correct tool while keeping the hose fully seated.
The XOD tutorial shown here uses a final visual check where approximately 1–2 threads remain visible after tightening.
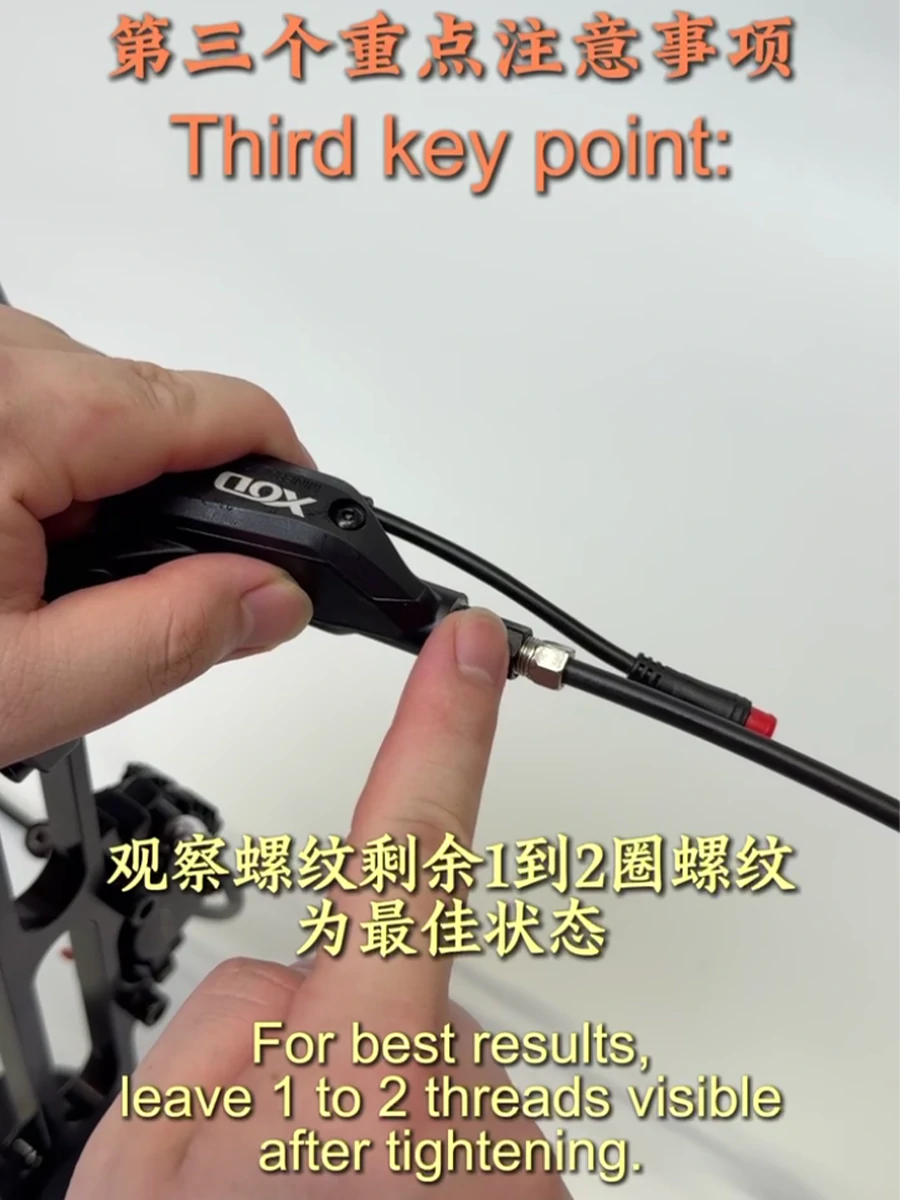
Do not keep tightening only to reproduce a specific number of visible threads. Different fittings or brake versions may vary. Use the correct fitting condition for your exact XOD brake and never force the connection.
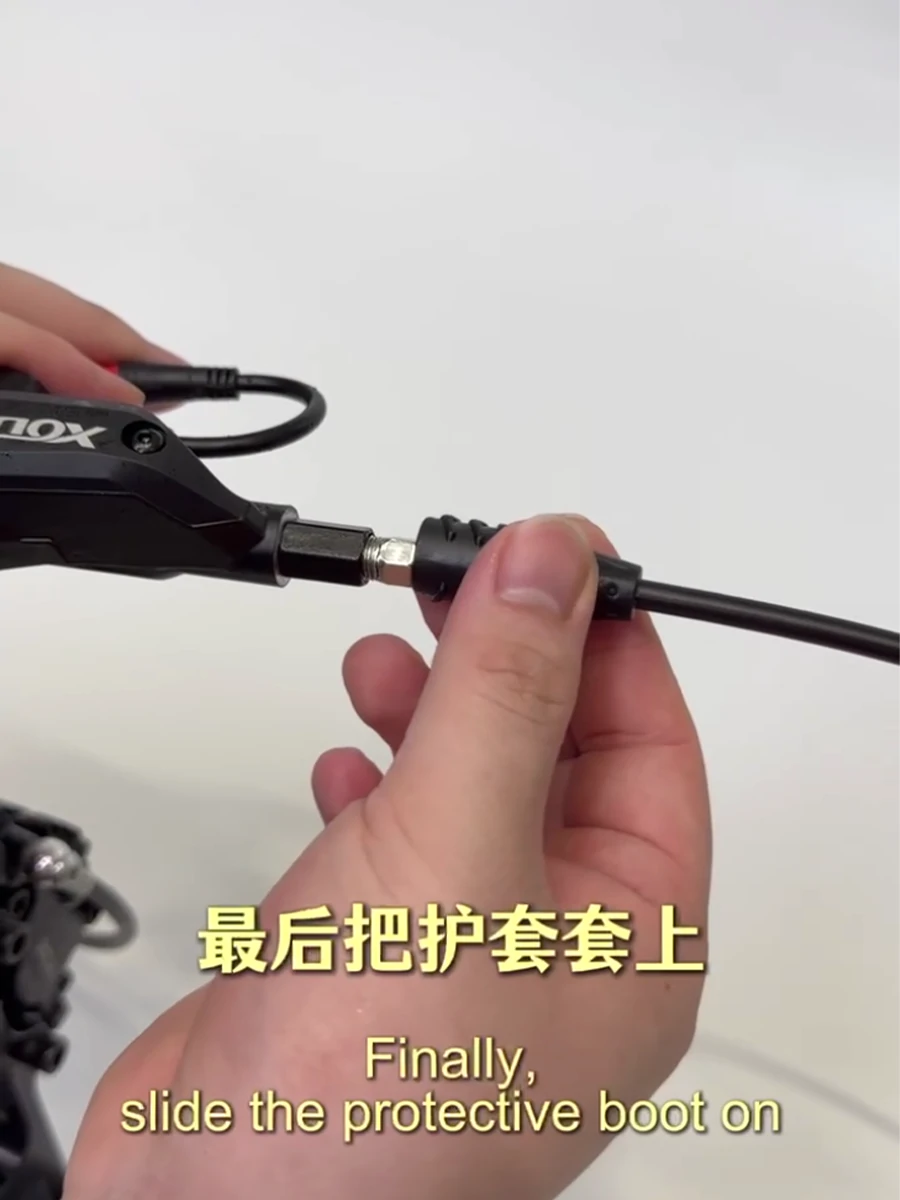
6Install the Protective Boot
Once the hydraulic fitting is correctly positioned, slide the protective rubber boot over the connection.
7Clean the Connection and Check for Leaks
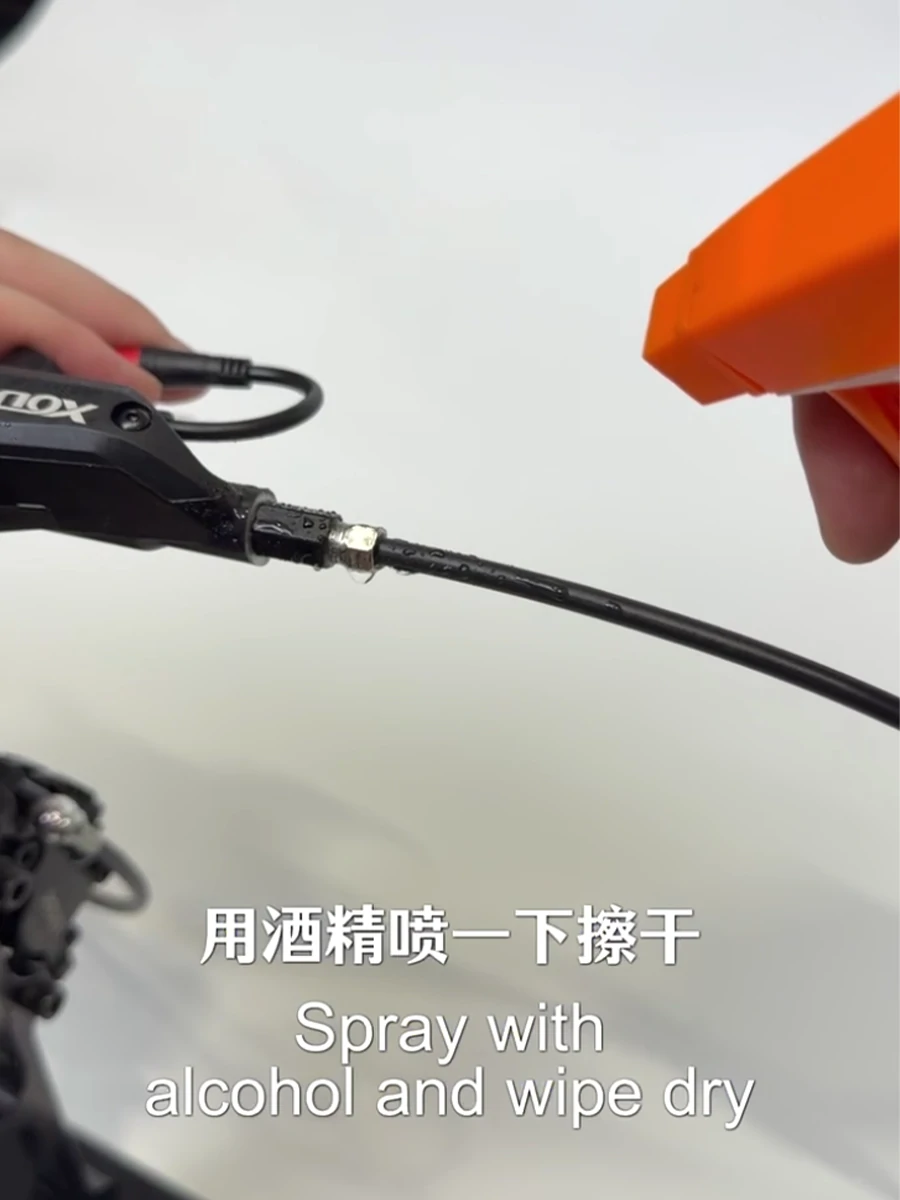
A small amount of mineral oil may remain around the fitting after the hose has been opened and reconnected.
Clean the exterior connection carefully with isopropyl alcohol and wipe it completely dry. Keeping the joint dry makes a fresh leak much easier to identify.
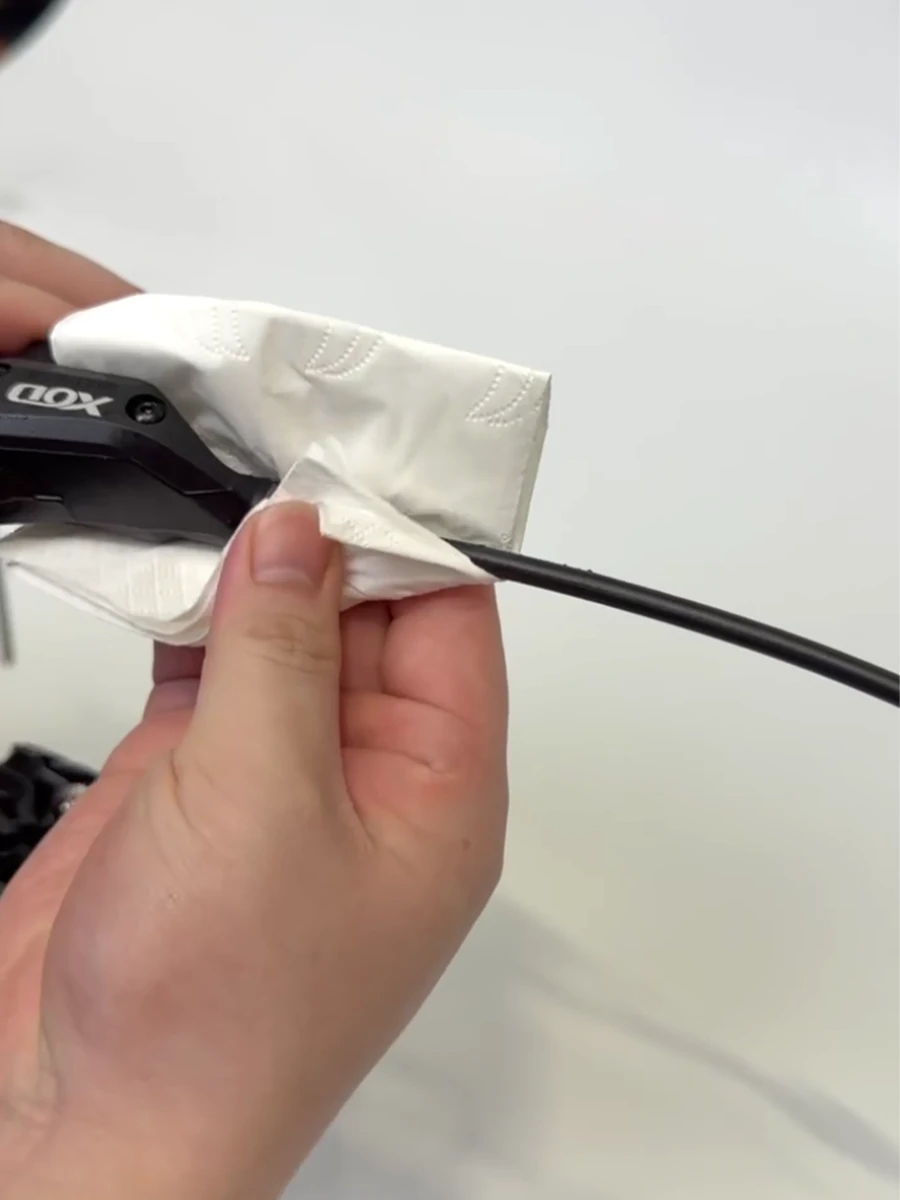
Do not contaminate the brake pads or rotor with mineral oil. If the friction surfaces become contaminated, correct the contamination before riding.
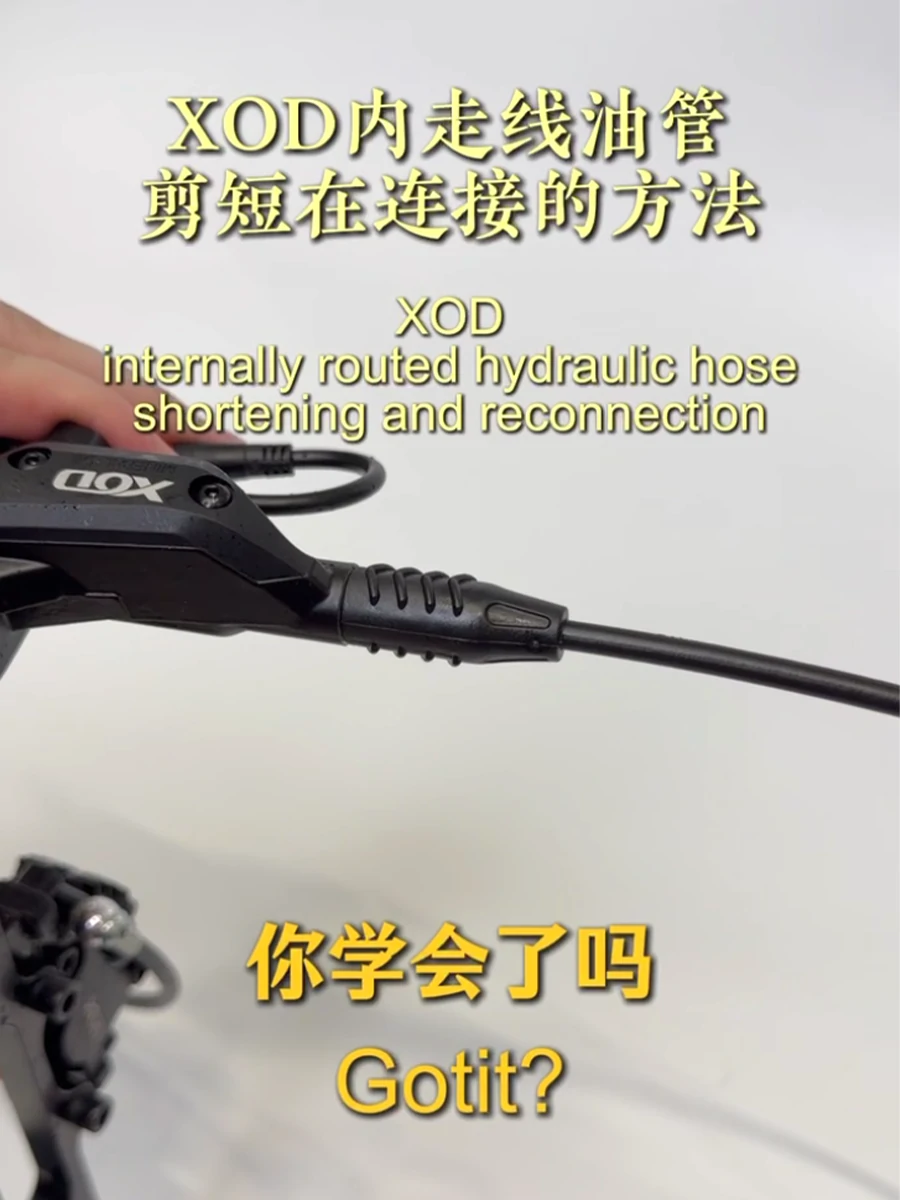
8Confirm the Finished Hose Routing
After reconnecting the hose, check the full routing again. Turn the handlebar left and right and confirm that the shortened hose still has enough movement.
🫧 Do You Need to Bleed XOD Brakes After Shortening the Hose?
Cutting and reconnecting the hydraulic hose opens the sealed hydraulic circuit, so air can enter and some mineral oil may be lost. After reconnection, inspect the joint for leaks and test the brake lever.
If the lever feels soft, spongy, inconsistent or travels unusually far, bleed the hydraulic brake before riding.
→ reconnect hydraulic fitting
→ clean connection
→ inspect for leaks
→ test brake lever
→ bleed if air entered the system
For the complete mineral-oil and air-removal procedure, read our How to Bleed XOD Hydraulic Brakes: Mineral Oil, Air Removal & Soft Lever Guide.
If you do not open or shorten the hydraulic hose and the lever already feels firm and consistent, you should not assume a new brake automatically needs bleeding.
❌ 5 Common Hydraulic Brake Hose Shortening Mistakes
1. Cutting the hose before checking full steering movement
A hose that looks tidy with the handlebar centered may become dangerously tight when the steering reaches full lock.
2. Crushing the hose while cutting it
A flattened or badly angled cut makes barb installation and sealing more difficult. Use a sharp tool that produces a clean, square cut.
3. Installing the hose barb at an angle
The barb should enter straight and seat fully. Do not force a crooked insert into the hose.
4. Tightening the fitting while the hose is not fully seated
Keep the hose pushed into the connection while assembling and tightening the fitting.
5. Assuming the brake does not need bleeding
Opening the hydraulic circuit creates an opportunity for air to enter. Always check lever feel after reconnection.
✅ Final Safety Check Before Riding
Do not finish the job immediately after tightening the fitting. Complete these checks first:
- Inspect the connection. The fitting should be correctly seated and the protective boot installed.
- Check for fresh mineral oil. Clean the fitting, squeeze the brake lever several times and inspect the joint again.
- Check the hose routing. Turn the handlebar fully in both directions.
- Check lever feel. It should feel firm, controlled and repeatable.
- Check the caliper and rotor. Make sure there is no severe rubbing or contamination.
- Check the motor cut-off sensor. For an electric scooter, confirm the brake sensor operates normally.
- Perform a low-speed brake test. Test braking in a safe area before returning to normal riding.
A clean hose route, no fresh mineral-oil leakage, a secure connection, normal steering movement and a firm, consistent brake lever.
For broader installation information, see the XOD Hydraulic Brake User Manual & Installation Guide.
If you are still deciding which brake fits your scooter, start with the XOD H-Series Hydraulic Brake Kit for Electric Scooters.
❓ XOD Hydraulic Brake Hose FAQ
Can I shorten an XOD hydraulic brake hose?
Yes. An excessively long XOD hydraulic brake hose can be shortened when the procedure is completed correctly. Leave enough hose for full steering, suspension and folding movement before making the cut.
How do I know how much hose to cut off?
Route the hose normally first. Turn the handlebar fully left and right and check any folding or suspension movement. Remove only the unnecessary excess while preserving a smooth hose curve and enough movement.
Can I use normal scissors to cut a hydraulic brake hose?
A sharp hydraulic hose cutter or another suitable cutting tool is preferred because the goal is a clean, square cut without crushing the hose. Whatever tool is used should produce an undamaged hose end.
What is the small brass part inserted into the brake hose?
It is the hose barb or insert. It supports the inside of the hydraulic hose and forms part of the hose-fitting connection.
Do I need to bleed an XOD brake after shortening the hose?
Not automatically, but the hydraulic circuit has been opened, so air can enter. After reconnecting the hose, inspect for leaks and test the lever. If it feels soft, spongy or inconsistent, bleed the brake before riding.
What happens if I cut the hydraulic hose too short?
The hose may become tight during steering, suspension or folding movement and place stress on the hydraulic connection. If the hose is too short, replace it with a correctly sized compatible hose rather than forcing the existing hose to reach.
Should I see 1 or 2 threads after tightening the XOD hose fitting?
The XOD tutorial used in this guide shows approximately 1–2 threads visible as a final visual reference for that fitting. This should not be treated as a universal torque or fitting specification for every XOD brake version.
Why does my brake lever feel soft after shortening the hose?
Air may have entered the hydraulic circuit or mineral oil may have been lost while the hose was open. Check for leaks first, then bleed the brake if the lever remains soft or spongy.
Final Takeaway
Shortening an XOD hydraulic brake hose is not complicated, but the quality of the cut and reconnection matters more than simply making the hose shorter.
Route and measure
→ make a clean cut
→ install the hose barb
→ assemble the compatible olive and fitting as specified
→ keep the hose fully seated
→ tighten and install the protective boot
→ clean and inspect for leaks
→ test lever feel
→ bleed if necessary
The most important rule is simple: do not ride until the connection is dry, the brake lever feels normal and the brake passes a controlled low-speed test.
Read the XOD Hydraulic Brake Bleeding Guide or the XOD Installation & User Manual.
If you are unsure about a hose connection or brake installation, contact service@xodbrakes.com with your XOD model and clear photos before riding.